SSM——SpringMVC(1)
SSM——SpringMVC(1)
一、Spring与Web环境集成
1.1 ApplicationContext应用上下文获取方式
- 应用上下文对象是通过
new ClasspathXmlApplicationContext(spring配置文件)方式获取的,但是每次从容器中获得Bean时都要编写new ClasspathXmlApplicationContext(spring配置文件) ,这样的弊端是配置文件加载多次,应用上下文对象创建多次。 - 在Web项目中,可以使用ServletContextListener监听Web应用的启动,我们可以在Web应用启动时,就加载Spring的配置文件,创建应用上下文对象ApplicationContext,在将其存储到最大的域servletContext域中,这样就可以在任意位置从域中获得应用上下文ApplicationContext对象了。
1.2 Spring提供获取应用上下文的工具
上面的分析不用手动实现,Spring提供了一个监听器ContextLoaderListener就是对上述功能的封装,该监听器内部加载Spring配置文件,创建应用上下文对象,并存储到ServletContext域中,提供了一个客户端工具WebApplicationContextUtils供使用者获得应用上下文对象。
所以我们需要做的只有两件事:
- 在web.xml中配置ContextLoaderListener监听器(导入spring-web坐标)。
- 使用WebApplicationContextUtils获得应用上下文对象ApplicationContext。
导入Spring集成web的坐标

- 配置ContextLoaderListener监听器。

- 通过工具获得应用上下文对象。

二、SpringMVC的简介
2.1 SpringMVC概述
- SpringMVC是一种基于Java的实现MVC设计模型的请求驱动类型的轻量级Web框架,属于SpringFrameWork的后续产品,已经融合在Spring Web Flow中。
- SpringMVC已经成为目前最主流的MVC框架之一,并且随着Spring3.0的发布,全面超越Struts2,成为最优秀的MVC框架。它通过一套注解,让一个简单的Java类成为处理请求的控制器,而无须实现任何接口。同时它还支持RESTful编程风格的请求。
2.3 SpringMVC快速入门
需求:客户端发起请求,服务器端接收请求,执行逻辑并进行视图跳转。
开发步骤:
- 导入SpringMVC相关坐标。
- 配置SpringMVC核心控制器DispathcerServlet。
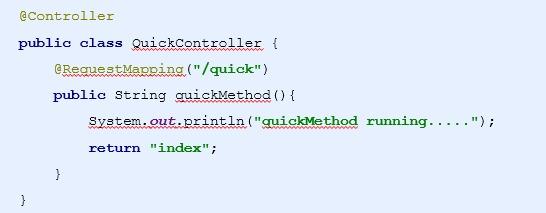
- 创建Controller类和视图页面。
- 使用注解配置Controller类中业务方法的映射地址。
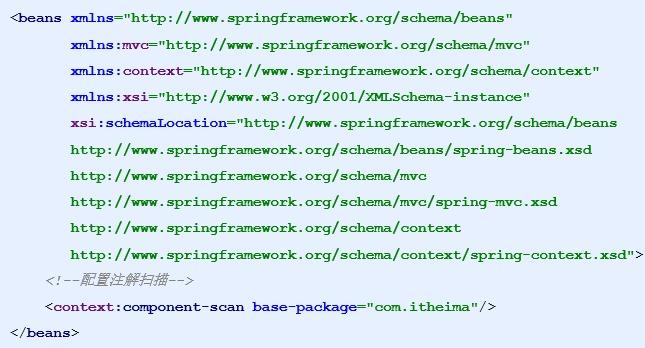
- 配置SpringMVC核心文件 spring-mvc.xml。
- 客户端发起请求测试。
导入Spring和SpringMVC的坐标。

- 导入Servlet和Jsp的坐标。

- 在web.xml配置SpringMVC的核心控制器。

- 创建Controller和业务方法。

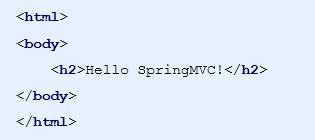
- 创建视图页面index.jsp。
- 配置注解。
- 创建spring-mvc.xml。
- SpringMVC流程图。

三、SpringMVC的组件解析
3.1 SpringMVC执行流程
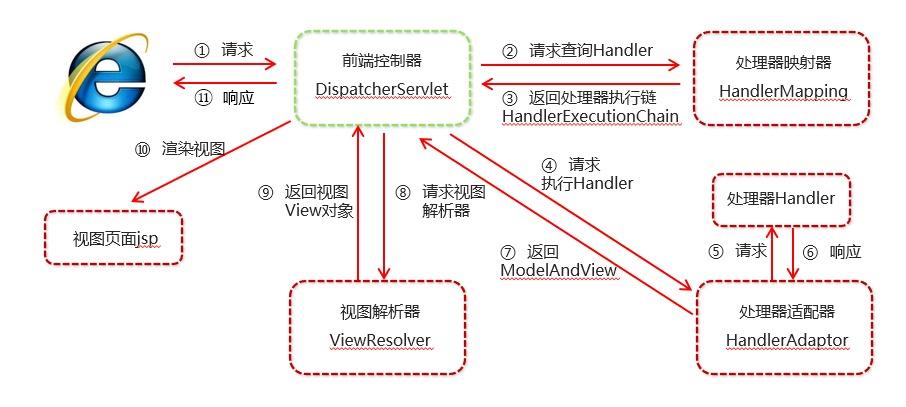
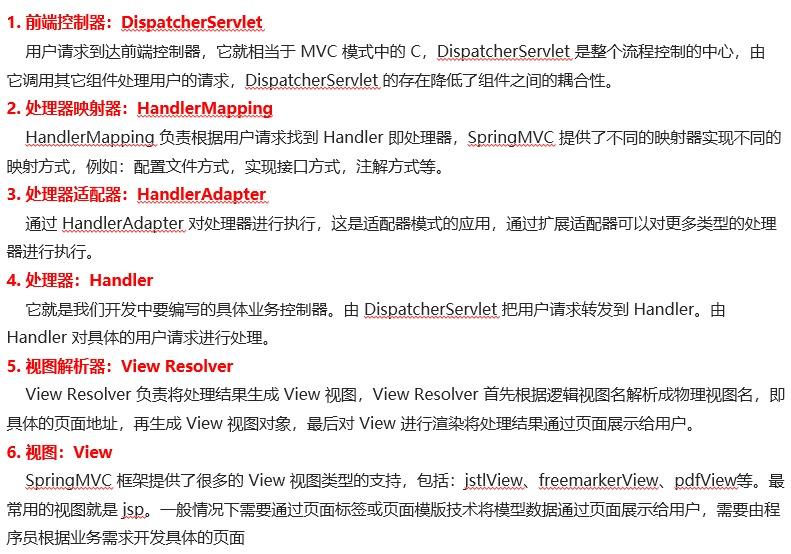
- 用户发送请求至前端控制器DispatcherServlet。
- DispatcherServlet收到请求调用HandlerMapping处理器映射器。
- 处理器映射器找到具体的处理器(可以根据xml配置、注解进行查找),生成处理器对象及处理器拦截器(如果有则生成)一并返回给DispatcherServlet。
- DispatcherServlet调用HandlerAdapter处理器适配器。
- HandlerAdapter经过适配调用具体的处理器(Controller,也叫后端控制器)。
- Controller执行完成返回ModelAndView。
- HandlerAdapter将controller执行结果ModelAndView返回给DispatcherServlet。
- DispatcherServlet将ModelAndView传给ViewReslover视图解析器。
- ViewReslover解析后返回具体View。
- DispatcherServlet根据View进行渲染视图(即将模型数据填充至视图中)。DispatcherServlet响应用户。
3.2 SpringMVC组件解析
3.3 SpringMVC注解解析

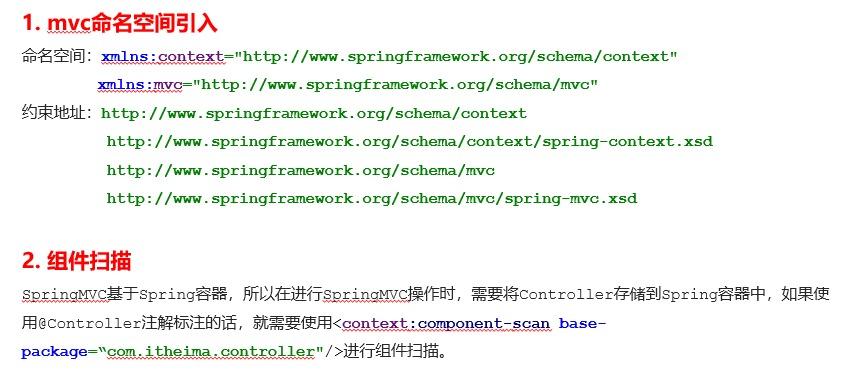
3.4 Spring-mvc配置解析
- 视图解析器:SpringMVC有默认组件配置,默认组件都是DispatcherServlet.properties配置文件中配置的,该配置文件地址
org/springframework/web/servlet/DispatcherServlet.properties,该文件中配置了默认的视图解析器,如下。

- 翻看该解析器源码,可以看到该解析器的默认设置,如下。

- 我们可以通过属性注入的方式修改视图的的前后缀。

All articles in this blog are licensed under CC BY-NC-SA 4.0 unless stating additionally.